Innehållsförteckning
Bläddra bland kategorierna
Bläddra bland författare
 AB
ABAlberto Boffi
 AL
ALAlessia Longo
 AH
AHAl Hoge
 AB
ABAljaž Blažun
 BJ
BJBernard Jerman
 BČ
BČBojan Čontala
 CF
CFCarsten Frederiksen
 CS
CSCarsten Stjernfelt
 DC
DCDaniel Colmenares
 DF
DFDino Florjančič
 EB
EBEmanuele Burgognoni
 EK
EKEva Kalšek
 FB
FBFranck Beranger
 GR
GRGabriele Ribichini
Glacier Chen
 GS
GSGrant Maloy Smith
 HB
HBHelmut Behmüller
 IB
IBIza Burnik
 JO
JOJaka Ogorevc
 JR
JRJake Rosenthal
 JS
JSJernej Sirk
 JM
JMJohn Miller
 KM
KMKarla Yera Morales
 KD
KDKayla Day
 KS
KSKonrad Schweiger
Leslie Wang
 LS
LSLoïc Siret
 LJ
LJLuka Jerman
 MB
MBMarco Behmer
 MR
MRMarco Ribichini
 ML
MLMatic Lebar
 MS
MSMatjaž Strniša
 ME
MEMatthew Engquist
 ME
MEMichael Elmerick
 NP
NPNicolas Phan
 OM
OMOwen Maginity
 PF
PFPatrick Fu
 PR
PRPrimož Rome
 RM
RMRok Mesar
 RS
RSRupert Schwarz
 SA
SASamuele Ardizio
 SK
SKSimon Kodrič
 SG
SGSøren Linnet Gjelstrup
 TH
THThorsten Hartleb
 TV
TVTirin Varghese
 UK
UKUrban Kuhar
Valentino Pagliara
 VS
VSVid Selič
 WK
WKWill Kooiker
Lär dig DewesoftX-programvaran utan DAQ-hårdvara: simulera signaler, kanaler och mer

September 16, 2025
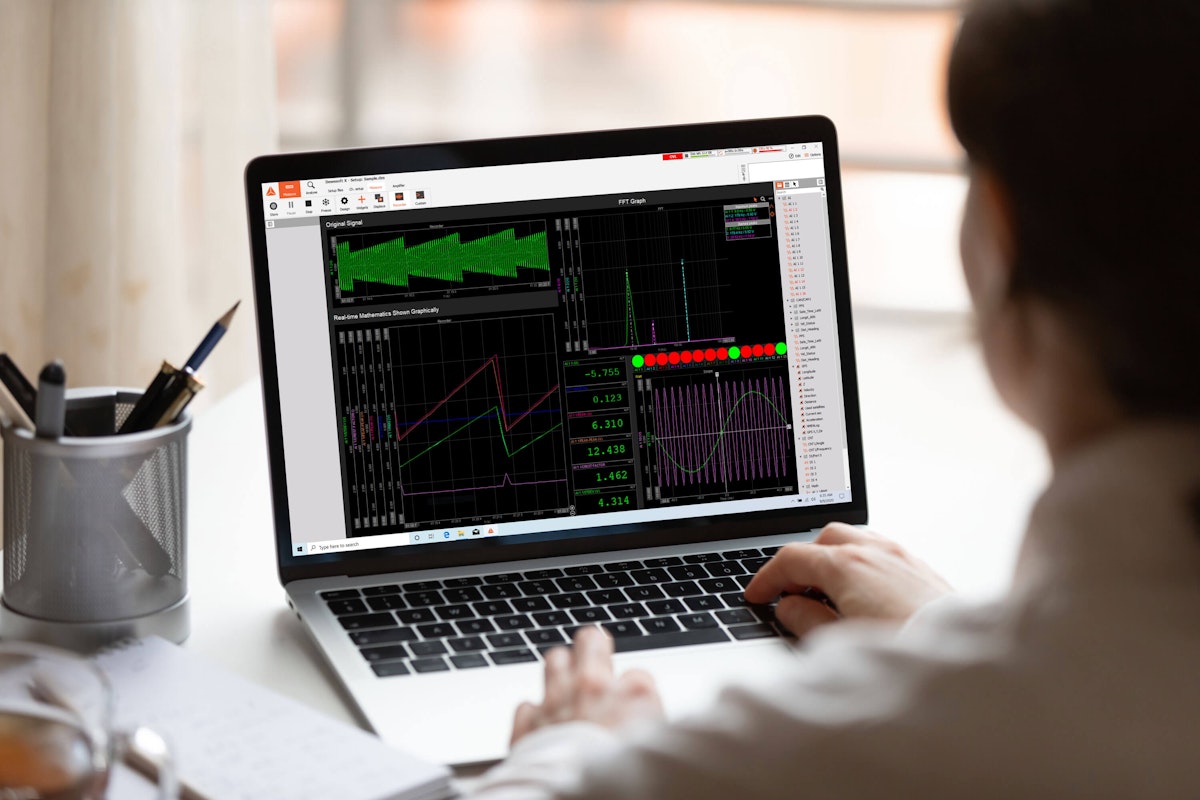
DewesoftX är Dewesofts lättanvända mjukvara för datainsamling och analys. DewesoftX ingår utan extra kostnad med alla större Dewesoft-instrument, inklusive SIRIUS, KRYPTON, IOLITE och OBSIDIAN, specialprodukter som DEWE-43A och Minitaur samt tröghetsgränssnitt som NAVION, DS-GYRO och Dewesofts GNSS (GPS)-mottagare. Dewesoft-hårdvaran fungerar som en "dongel" – bara att ansluta den godkänner programvarulicensen. Dessutom kan programvaran installeras på vilken dator som helst och användas för att spela upp och analysera data utan licens eller ansluten Dewesoft-hårdvara.
Men vad gör du om du vill lära dig eller testa programvaran i mätläge och inte har någon DAQ-hårdvara för att få ”live”-data? Som tur är finns det flera lösningar. Den här artikeln visar hur du får tillgång till och använder fyra olika lägen för att generera realtidsdata i DewesoftX utan DAQ-hårdvara. Den visar också hur man simulerar olika Dewesoft-signalförstärkare och signaler. Dessa funktioner gör det möjligt att testa och bättre förstå DewesoftX-programvarans kapacitet.
Ladda ner DewesoftX-programvaran
Du kan fritt ladda ner och installera DewesoftX-programvaran från företagets webbplats. Programvaran ingår utan kostnad med alla Dewesoft DAQ-instrument. Men även om du ännu inte har några Dewesoft-instrument, uppmuntras du att ladda ner programvaran och lära dig hur den fungerar. Det är helt gratis och utan förpliktelser – besök helt enkelt nedladdningscentret via denna länk:
Besök nedladdningscentret:
En annan anledning att ladda ner DewesoftX är för att spela upp datafiler. Det kostar inget att använda DewesoftX för att spela upp .dxd-datafiler. Du kan fritt installera programvaran på valfritt antal datorer i detta syfte. Inga licenser krävs.
Ladda gärna ner och installera din kopia av DewesoftX via länken ovan. Därefter kan du följa exemplen nedan för att lära dig hur man använder programvaran i simuleringsläge.
Simuleringslägen för realtidsdata i DewesoftX
Det finns fyra sätt att få ”live”-data i DewesoftX:s "Measure"-läge utan att ha någon Dewesoft DAQ-hårdvara tillgänglig:
|
Metod |
Fördelar |
Nackdelar |
|
Det enklaste och mest lättanvända läget. Hundratals kanaler kan genereras automatiskt. |
Begränsat till automatiserade "swept"- sinusfunktioner. Användaren har ingen kontroll över datan. |
|
|
Val av vågformstyper (sinus, fyrkant, triangel, brus). Vågformer kan kombineras för att skapa mer komplexa sammansatta signaler. Hundratals anpassade kanaler kan genereras. Detta läge kan kombineras med vilket som helst av de andra simuleringslägena. |
Kräver viss kunskap om matematikmotorn. Det kan vara tidskrävande att skapa många kanaler. |
|
|
Kompatibel med i princip alla Windows-datorer som har ett ljudkort och minst en mikrofon. Användarkontrollerad (akustisk) data från mikrofonen är idealisk för FFT-träning och snabba händelser med kort stigtid i triggerläget. |
Maximalt två kanaler kan erhållas från standardljudkort. Begränsat till akustisk data med ljudkortets inneboende maximala samplingsfrekvens och bitupplösning. |
|
|
Tillåter användning av tidigare inspelad analog data som om den pågick “live.” |
Kräver några speciella plugins. Den mest komplexa konfigurationen hittills. |
Detta applikationsdokument visar hur du aktiverar varje läge. Därefter följer några grundläggande tips för DewesoftX-programvaran, inklusive hur du aktiverar de virtuella signalförstärkarna, väljer inspelningskanaler, skapar visningar, fångar data och spelar upp den.
OBS! Detta dokument är inte avsett att ersätta hela DewesoftX-manualen. Det är en "snabbstartsguide" för tekniker och ingenjörer som börjar med Dewesoft DAQ-system och vill experimentera med programvaran innan de har någon Dewesoft-hårdvara för att samla in data.
Välja ett simuleringsläge
Starta DewesoftX på din dator. Om ingen Dewesoft DAQ-hårdvara är ansluten kommer programvaran att visa att den är i OFFLINE-läge. Detta indikeras i det övre högra hörnet av skärmen. Detta är helt normalt och inget att oroa sig för.
Klicka på menyn "Options" nära det övre högra hörnet av skärmen, och klicka sedan på "Settings":
Inställningsdialogrutan visas. Klicka på "Devices" i vänstra kolumnen, och klicka sedan på "Simulated devices" under "Local system":
Skärmbilden ovan visar flera möjligheter. Alternativet "File Replay" saknas troligen i ditt system eftersom denna plugin måste installeras separat. Detta kommer att behandlas under avsnittet Uppspelning av tidigare inspelad data senare i denna artikel. Du behöver inte oroa dig för att installera denna plugin om du inte vill använda detta läge.
1. Simulerade kanaler-läge
Det självgenererade vågforms-läget är det enklaste att aktivera och använda. Det är dock begränsat till sweepade sinusvågor, som inte kan styras eller modifieras.
Låt oss börja med metoden för simulerade kanaler. Precis som i föregående steg, efter att ha startat DewesoftX, klicka på "Options" uppe till höger och välj sedan "Settings". När dialogrutan öppnas, klicka på "Simulated devices" under "Local system" i "Devices". Under "Simulated channels mode", välj “Simulated channels.”
Vid detta tillfälle bör din skärm se ungefär ut så här:
Ange önskat antal analoga, räknar- och digitala kanalindata. Vi har valt 8, 1 och 8, som visas ovan. Du kan även ange flera simulerade asynkrona analoga och digitala utgångskanaler, men användningen av dem ligger utanför denna artikels omfattning. Klicka sedan på OK för att stänga dialogrutan.
Klicka på "Ch. setup" högst upp på DewesoftX-skärmen och se de åtta analoga kanalerna som du skapade:
Hur ser kanalerna ut? Klicka bara på "Measure" nära toppen av skärmen och ta en titt:
Endast en kanal visas eftersom som standard är endast den första analoga kanalen inställd på “Used” i konfigurationsskärmen. Vi kommer senare att lära oss mer om hur man aktiverar kanaler, använder de simulerade Dewesoft-förstärkarna, spelar in och spelar upp data.
Se nästa avsnitt om du vill lägga till egna vågformskanaler med den inbyggda matematikmotorn. Annars kan du gå vidare till avsnittet Grundläggande DewesoftX-användning.
2. Matematikkanalsläge för vågformsgenerering
I detta läge kan du skapa dina kanaler med hjälp av DewesoftX inbyggda matematikmotor. Eftersom de simulerade kanalerna också skapas kan du kombinera dem med dina programmerade kanaler för att skapa ytterligare kanaler. I princip är detta en förlängning av metoden för simulerade kanaler som visades ovan.
På skärmen för "Ch. setup", klicka på ikonen för "Math", och sedan på ikonen för "Formula":
Programvaran skapar en grundläggande matematisk formel för dig att definiera och öppnar den automatiskt så här:
Låt oss ställa in den som en 2 Hz sinusvåg med en amplitud på ±10 V. Börja med att ange ett namn för kanalen. Uppe i det övre högra hörnet av dialogrutan (se nedan) skrev vi in “Sinus 2 Hz” som "Name", “waveform” som "Description", och A som "Units". Du kan ange vilka värden du vill. Klicka sedan på "Signals" under "Other math functions" , och klicka på "sine" ikonen:
Till en början kommer formellinjen att visa ett syntaxfel eftersom sinusfunktionen kräver att en frekvens (i Hertz) anges inom parenteserna.
Klicka i formelredigeringsraden och redigera texten. Skriv “2” inom parenteserna. Programvaran skapar som standard en vågform på ±1 V, så lägg till *10 i formeln för att konvertera den till en ±10 V sinusvåg:
Klicka på OK-knappen längst ner till höger i formelredigeraren för att stänga denna funktion.
Du kan lägga till fler vågformer genom att upprepa stegen ovan och ändra dem något. Till exempel kommer vi att skapa en ±50 V fyrkantvåg på 1,5 Hz och en ±100 A triangulär våg på 60 Hz. Se nedan för hur detta ser ut på skärmen för matematikinställningar.
Vi kan kontrollera hur dessa signaler ser ut genom att klicka på "Measure" nära toppen av skärmen. Inspelningsskärmen visas:
OBS! Om endast en vågform visas, klicka på (+) under "Recorder / Controls" i vänstra panelen för att lägga till fler kanaler till standardgrafen i inspelaren. Du kan klicka på (–) för att ta bort kontroller:
Innan vi går vidare, låt oss skapa en virtuell kanal som kombinerar flera andra. Gå tillbaka till fliken "Math" i "Ch. Setup" och skapa en ny formel-matematikkanal. Du kan skriva vad du vill, men vi döpte den till “Combo Waveform” med beskrivningen ”sinus+triangle” och enheten A. Följ nu dessa steg:
Rensa bort allt som finns i formellinjen så att den är tom.
Dubbelklicka på kanalnamnet ”Sinus 2 Hz” i listan för att lägga till det i formellinjen.
Klicka i formellinjen och skriv +
Dubbelklicka på kanalnamnet “Triangle” i listan för att lägga till det i formellinjen.
Så här ska det se ut nu:
När din matematikkanal ser ut så här, klicka på OK för att spara den. Gå sedan tillbaka till "Measure screen" och klicka en gång på (+) under "Recorder / Controls" för att lägga till en ytterligare kanal i grafen:
Nästa kanal kommer automatiskt att läggas till i inspelningsgrafen, så vi kommer att se den kombinerade vågformen längst ned på skärmen:
Om du är redo att fortsätta, gå vidare till avsnittet Grundläggande DewesoftX-användning för att lära dig hur du ställer in dina skärmar, spelar in data och spelar upp den.
3. Ljudkortsläge
Det tredje sättet att få “live”-data i DewesoftX-programvaran utan någon Dewesoft DAQ-hårdvara är att använda datorns ljudkort som datakälla. Detta gör det möjligt att spela in ljud och återge det både grafiskt och hörbart.
Om du använder en bärbar dator har den troligen ett inbyggt ljudkort med mikrofon och högtalare. När du använder en stationär dator kan du behöva ansluta en extern mikrofon för att spela in ljud samt högtalare eller hörlurar för att höra uppspelningen (om det behövs).
För att komma åt detta läge, starta DewesoftX på din Windows-dator. Klicka på menyn "Options" (Alternativ) uppe till höger på skärmen och klicka sedan på "Settings" (Inställningar):
Inställningsdialogrutan visas. Klicka på "Devices" i den vänstra kolumnen och klicka sedan på "Sound card" under "Local system":
Programvaran identifierar automatiskt alla DirectX-ljudkort i din bärbara eller stationära Windows-dator och gör dem tillgängliga som analoga ingångar. Klicka på OK-knappen för att stänga dialogrutan för "Settings". Klicka vid behov på ikonen "Analog in" för att visa de två ljudkortskanalerna:
Observera att väljaren för "Dynamic acquisition rate" kommer att innehålla de samplingshastigheter som stöds av ditt systems ljudkort. I de flesta fall är dessa 11025, 22050 och 44100 Hz, men ditt system kan skilja sig. I exemplet ovan ändrade vi hastigheten till 22050 Hz, men du kan ställa in det som du själv föredrar.
När du ansluter en mikrofon till datorn bör du kunna göra ljud eller knacka lätt på den för att se responsen på displayen:
DewesoftX-programvaran kan spela upp det inspelade ljudet i "Analyze"-läget. För att göra detta, öppna en datafil som innehåller ljud och navigera till en av visningsskärmarna. Observera knappen "Sound" nära det övre vänstra hörnet av skärmen:
Det röda X:et i "Sound"-ikonen indikerar att ingen kanal ännu har valts för ljuduppspelning. Klicka på ikonen och välj en kompatibel kanal från listan:
I vårt exempel valde vi kanalen som heter "acc/v."
Klicka på PLAY för att starta uppspelningen av datan, så kommer du att höra ljudet från den valda kanalen via datorns ljudsystem. Titta gärna på den korta videon nedan för att se och höra hur detta fungerar:
Byt ut detta med den faktiska videofilen kallad DewesoftX analyze replay with sound.mp4
Om du är redo att fortsätta, gå vidare till avsnittet Grundläggande DewesoftX-användning för att lära dig hur du ställer in dina skärmar, spelar in data och spelar upp den.
4. Läge för uppspelning av tidigare inspelad data
Det fjärde sättet att få “live”-data i DewesoftX-programvaran utan någon Dewesoft DAQ-hårdvara är att spela upp tidigare inspelad data i "Measure"-läget. Denna metod kräver att två speciella plugins installeras. Dessa plugins ingår inte i standardinstallationen av DewesoftX, så du måste ladda ner dem från Dewesofts webbplats och installera dem enligt instruktionerna nedan.
Du behöver också minst en befintlig datafil som har spelats in i Dewesoft och exporteras till ett specifikt format med hjälp av ett anpassat filter.
Två plugins krävs för att möjliggöra datauppspelning i "measure"-läget:
FileReplay: Gör det möjligt att spela upp konverterade .rpl-datafiler i "Measure"-läget.
FileReplayExport: Gör det möjligt att konvertera befintliga datafiler till .rpl-formatet som krävs av FileReplay-funktionen.
Ladda ner och installera FileReplay-plugins
Följ dessa steg för att aktivera filuppspelningsplugins:
Ladda ner “FileReplay” och “FileReplayExport”-plugins via denna länk.
Packa upp de nedladdade filerna och lägg dem i mappen Addons i DewesoftX-installationen (exampel: DEWESoftX\Bin64\Addons64).
Starta om datorn för att säkerställa att DewesoftX upptäcker pluginsen.
Konvertera en datafil till .rpl-format
Läget ReplayFile kräver att data konverteras till .rpl-formatet. När pluginsen är installerade kan en DewesoftX .dxd datafil konverteras till .rpl filformatet. Denna process visas nedan:
Välj en .rpl-datafil för uppspelning i "measure"-läget
Gå tillbaka till inställningsskärmen Simulerade enheter som visas i början av detta avsnitt och välj "File Replay" som ditt simuleringsläge. När du har gjort detta kommer flera ytterligare kontroller att visas nedanför, där du måste välja .rpl-filen och ange för DewesoftX hur filen ska spelas upp. Det ser ut så här:
Vi valde en fil som heter HV.rpl. Vänligen välj den fil du exporterade i föregående steg. DewesoftX visar antalet kanaler som den valda filen innehåller, dess dynamiska samplingsfrekvens och filens längd i sekunder.
Markera kryssrutan "Repeat" om du vill att DewesoftX ska spela upp datafilen i en kontinuerlig loop. Som standard spelas filen upp i samma hastighet (frekvens) som den spelades in med. Men under avsnittet "Speed" kan du välja att spela upp filen så snabbt som möjligt, eller i en anpassad hastighet.
När du nu återvänder till "Ch. Setup" kommer kanalerna från din datafil att vara tillgängliga för visning, inspelning med mera, precis som om de kom in i systemet i realtid!
Syftet med filuppspelningsläget
Användare kan experimentera med olika filter och matematiska funktioner på verkliga data med hjälp av datauppspelningsmetoden (att lägga till och redigera filter och andra matematiska funktioner kan även göras i "Analyze"-läget). Detta läge tillför en ny nivå av realism till DX-programvarans utbildnings- och demonstrationsmöjligheter.
Läs mer: Detailed manual on the file replay plugin.
När du är redo att fortsätta, gå vidare till avsnittet Grundläggande DewesoftX-användning för att lära dig hur du ställer in dina skärmar, spelar in data och spelar upp den.
Grundläggande DewesoftX-användning
Använda virtuella Dewesoft-förstärkare
Dewesoft tillverkar ett brett sortiment av signalbehandlingsförstärkare för DAQ-produktsortimenten SIRIUS, KRYPTON, IOLITE och OBSIDIAN. Här är en lista över de vanligaste typerna som finns tillgängliga:
Lågspänning
Högspänning
Ström
Strain gauge/brygga
Accelerometer (IEPE)
Accelerometer (laddning)
Temperatur (termokopp)
Temperatur (RTD)
Strain gauge-förstärkare kan ursprungligen mäta från strain gauge- och bryggsensorer, lastceller, ohmiska sensorer som string pots, och ännu fler med hjälp av praktiska DSI “smarta” gränssnitt. Flera andra förstärkare, som specifika spännings-, multi- och universella modeller, är också DSI-kompatibla.
Du kan tilldela en virtuell version av i princip vilken Dewesoft-signalbehandlingsförstärkare som helst till varje kanal eller till alla dina kanaler. För att välja en, högerklicka helt enkelt på önskad kanals "Amp. Name"-ruta, så visas denna dialogruta:
Klicka på "Offline setup"… så visas en dialogruta där du kan välja en förstärkare efter namn:
Här kan du välja mellan USB-anslutna förstärkare från SIRIUS-serien och DEWE-43A, EtherCAT-anslutna förstärkare från IOLITE- och KRYPTON-serierna samt andra. Det ligger utanför denna artikels omfattning att beskriva allt i detta avsnitt, men för att hålla det enkelt, välj gärna USB / SIRIUS-LV-förstärkaren:
Klicka på knappen "Set to all", så tilldelas alla dina simulerade analoga ingångar en virtuell SIRIUS-LV lågspänningsförstärkare. Klicka på X i det övre högra hörnet av dialogrutan för att stänga den, och din skärm kommer att se ut så här:
Alla åtta analoga ingångskanaler bör ha en virtuell SIRIUS LV (Lågspänning) förstärkare. Som standard är endast den första analoga kanalen inställd på "Used".
Stapeldiagrammet för varje kanal rör sig inom kolumnen "Values" på skärmen när den virtuella eller uppspelade datan kommer in i systemet. Röd färg indikerar en överbelastning om en signal överstiger Min/Max-områdena. Detta är helt normalt och visar hur programvaran reagerar på verkliga signaler.
Använda simulerade, matematiska och uppspelade kanaler
Vid det här laget är vi redo att använda de analoga kanalerna. Observera att varje analog kanal har en rad med kontroller och visningar. Från vänster till höger är dessa:
| Rad med kontroller och visningar | Beskrivning |
|---|---|
| ID | Kanals ID-nummer, från 1 till n. |
| Used | En växlingsknapp som ställer in kanalen till antingen "Used" eller "Unused". När den är inställd på "Used" kommer kanalen att vara tillgänglig för visning på skärmarna och den kommer att spelas in. Den kan också användas i matematiska och andra bearbetningsfunktioner. Obs! Kanaler som är inställda på "Unused" visas inte, spelas inte in och bearbetas inte under inspelning. |
| Color | Färgen för denna kanal (klicka för att välja). |
| Name | Du kan skriva över det automatiska namnet här för varje kanal (skriv för att ändra). |
| Ampl. Name | Visar modellnamnet på förstärkaren |
| Range | Visar det övergripande mätområdet (klicka för att välja) |
| Measurement | Visar mätningstypen (klicka för att välja) |
| Min. | Visar det valda minimiområdet (skriv för att ändra) |
| Values | Visar ett realtids stapeldiagram topp-till-topp som representerar signalens amplitud samt min-/maxvärden |
| Max. | Visar det valda maximiområdet (skriv för att ändra) |
| Physical qty. | Visar den fysiska storheten som mäts (klicka för att välja) |
| Units | Visar mätenheten (skriv för att ändra) |
| Zero | Tar bort signalens nolläge (klicka för att aktivera nollfunktionen) |
| Setup | Klicka för att öppna kanalens inställningsdialog |
Kanalsinställningar
Klicka på "Setup"-knappen på höger sida av den första kanalen för att öppna kanalens inställningsdialog:
Du kan experimentera med inställningarna i denna dialog för att välja bland de tillgängliga mätområdena. Varje förstärkartyp har olika val baserat på vilken typ den är och vilka funktioner den har. För tillfället räcker det att du ser vilka möjligheter som finns och hur du kommer åt dem.
Learn more in the DewesoftX manual - Channel Setup Module
Välja kanaler för visning och inspelning
På vänster sida av skärmen för kanalsinställningar, klicka på "Used" för de kanaler du vill visa och spela in. Vänligen ställ in alla på "Used" som visas här:
Tips: Du kan växla alla analoga kanaler mellan "Used/Unused" med ett enda klick genom att först klicka på rubriken "Used" eller "Unused" på någon av kanalerna nedanför.
Mätvyn
Klicka på fliken "Measure" nära toppen av skärmen så visas inspelningsvyn. En inspelningsgraf skapas automatiskt åt dig, och var och en av de 8 kanalerna visas i en separat graf. Om du bara har valt några kanaler som "Used" på inställningsskärmen, visas bara dessa kanaler här.
Vi rekommenderar att du läser DewesoftX manual för att lära dig mer om hur programvaran används, men låt oss gå igenom några grundläggande saker för att komma igång.
Vänster och höger panel för widget- och kanalinställningar
En "widget" är ett displayelement. I exemplet ovan är den enda widgeten på skärmen en inspelningsgraf. Du kan använda valfri kontroll på widgetens egenskapspanel på skärmens vänstra sida för att ändra den valda widgetens utseende och beteende. På skärmens högra sida kan du via kanalens egenskapspanel se och ändra vilka kanaler som är kopplade till den valda widgeten.
Lägg till fler widgets i visningen
Detta avsnitt förutsätter att du använder simulerade signaler och vill experimentera med digitala och räknaringångar. Vår skärm har ikoner för "Counters" och "Digital in" bredvid "Analog in"-ikonen, som visas nedan:
Men om din skärm för "Ch. setup" saknar ikoner kan du lägga till dem. Klicka helt enkelt på ikonen "More…" och välj sedan de ingångstyper du vill lägga till i dialogrutan som visas:
Vårt exempel använder vågformsimuleringsläget med analoga, digitala och räknarutgångar. Därför har vi lagt till Digitala ingångar och Räknare på "Ch. setup"-skärmen. Om dina ikoner saknas på skärmen, följ stegen ovan för att lägga till dem. Gå sedan till dessa inställningsskärmar och sätt en eller flera av dessa digitala och räknaringångar till "Used".
Lägga till digitala ingångar och räknare i visningarna
Om man tittar på standardskärmen "Custom" hade vi en analog kanal där. Men titta på panelen till höger, eftersom den visar att fler analoga kanaler, samt flera räknare och digitala ingångar, kan visas:
Klicka på ikonen Widgets och välj sedan "Digital meter" från listan som visas:
En digital mätare kommer automatiskt att läggas till på Custom-visningen och kopplas till den första ingångskanalen, som visas nedan:
Med den digitala mätaren fortfarande markerad, klicka på önskad kanal i den högra panelen för att tilldela kanalen till mätaren. Du kan också klicka och dra mätaren till valfri plats på skärmen samt dra i hörnen för att ändra dess form och storlek. I skärmbilden nedan flyttade vi mätaren till höger. Vi klickade även en gång på inspelningsgrafen och tilldelade den här kanalen, samtidigt som vi tog bort den andra kanalen.
Lagra data
Data lagras i "Measure"-läget. Titta på de två stora ikonerna nära Dewesoft-loggan uppe till vänster på skärmen. Klicka på "Measure" för att konfigurera systemet och börja spela in data.
Klicka sedan på fliken "Ch. setup" och därefter på knappen "Analog in". Nu kan du ändra den dynamiska samplingsfrekvensen (Dynamic acquisition rate) och välja andra inställningar:
Att lagra data är lika enkelt som att trycka på "Store"-knappen uppe till vänster på skärmen.
När ett riktigt Dewesoft-instrument är anslutet bestämmer hårdvarans kapacitet vilka samplingsfrekvenser som är möjliga. Standardläge för inspelning är "Always fast", men det finns även andra alternativ kopplade till triggerfunktioner, datalagring med reducerad hastighet samt en kombination av båda.
Uppspelning av data
Data spelas upp i "Analyze"-läget. Se de två stora ikonerna nära Dewesoft-logotypen uppe till vänster på skärmen. Klicka på "Analyze" för att välja en fil för uppspelning och analys.
Som standard visas tillgängliga datafiler. Dubbelklicka på någon av dem för att öppna den för analys. En exempeldatafil som heter Example drive.dxd installeras automatiskt med mjukvaran. Den innehåller analog, CAN-buss, video och GPS-data. Dubbelklicka på denna fil för att öppna den:
Klicka på Play-ikonen nära det övre vänstra hörnet av skärmen för att se kanalerna spelas upp synkront. Detta visar kraften i DewesoftX-mjukvaran att presentera tids-synkroniserad data från flera domäner. Klicka på Stop, och dra sedan den gula markören som visas antingen i inspelningsgrafen eller i referenskanalen ovanför displaywidgets.
Få mer vägledning om DewesoftX
Som nämnts tidigare är denna korta artikel till för att hjälpa dig komma igång med simuleringsläget. För mer omfattande hjälp med DewesoftX-mjukvaran, vänligen hänvisa till den online manualen. Du kan också nå hjälp-funktionen direkt i DewesoftX genom att trycka på F1 på ditt tangentbord. Den inbyggda hjälpen kräver ingen internetuppkoppling.
Sammanfattning
Denna artikel erbjuder en praktisk guide för att använda DewesoftX-programvarans simuleringslägen för träning och demonstration utan att kräva fysisk Dewesoft-hårdvara. Den täcker fyra mångsidiga simuleringsalternativ:
Generering av interna testsignaler (simulerade kanaler)
Användning av datorns ljudkort som en live datakälla
Skapande av anpassade vågformer via den inbyggda matematikmotorn
Konvertering och uppspelning av inspelade datafiler i realtid med hjälp av specialiserade plugins
Dessa funktioner gör det möjligt för användare att öva arbetsflöden för datainsamling, testa konfigurationer och utbilda personal med virtuell eller uppspelad data, vilket maximerar nyttan av Dewesoft-systemet även innan fysiska sensorer eller utrustning är anslutna.
More information:
